Seed Sowing Masterclass
Now the days are getting longer and the temperatures are starting to rise, it’s time to start seed sowing in earnest. Stick to sowing hardy annuals this month, as it isn’t quite warm enough for the half-hardies yet – these can be sown towards the middle of next month.
A Gabriel Ash greenhouse is the perfect place to nurture seeds into life.
Containers
Plastic pots, seed trays or module trays are easy to use, can be washed after use and stored at the end of each season. If you can, pay a little bit more and buy strong, robust trays and pots which will last a lifetime rather than ending up in landfill.
If you’d rather go plastic-free, the number of alternatives is growing: from wooden seed trays to pots made from bamboo or coir, both of which will biodegrade over time. You can even make your own mini-pots using newspaper wrapped around wooden moulds.
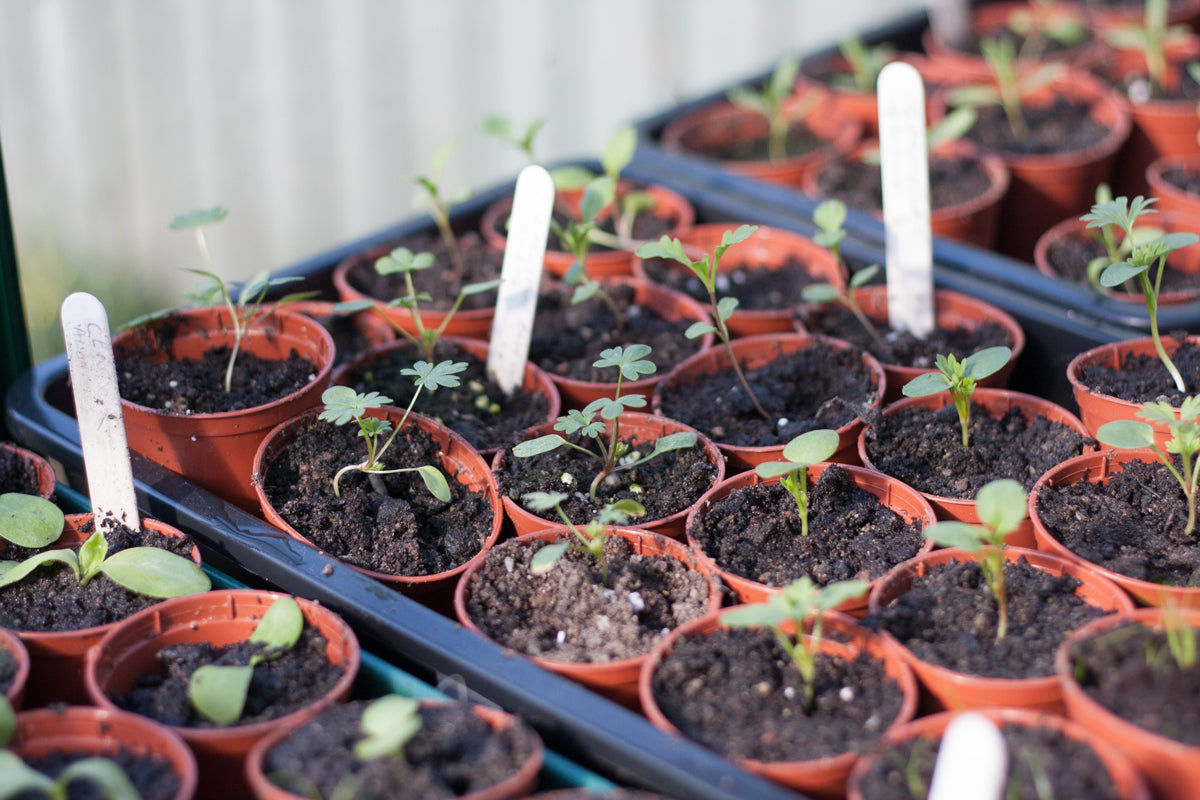
For plants that grow quickly and develop long roots such as sweet peas and French beans, use taller pots when sowing as this will give them plenty of room to grow. I like to use the pots clematis or roses come in from the garden centre.
Compost
You can buy specialist seed compost, but multipurpose, peat-free compost is fine, just add some perlite to the compost to improve the drainage.
Fill the containers to just below the rim, gently firming down the compost and tapping the tray or pot on the potting table to help the compost to settle and to eliminate any air pockets.
How deep?
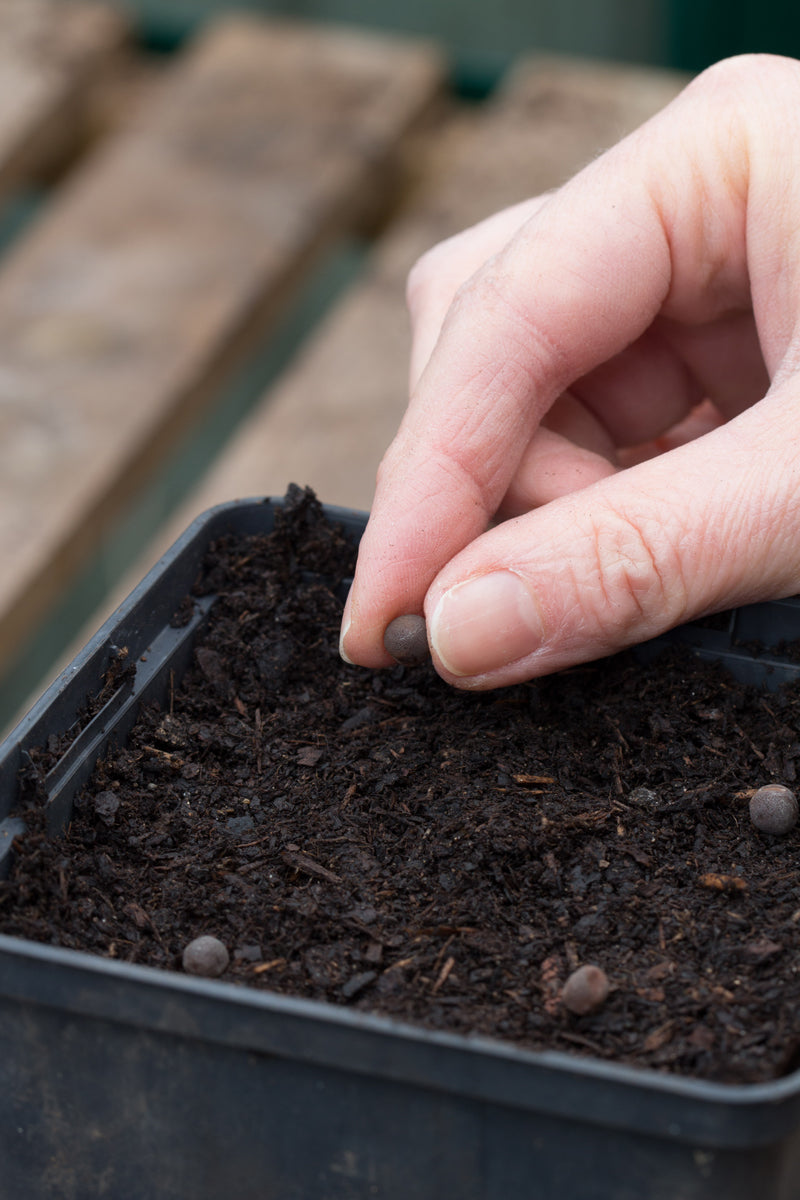
Sow tiny seeds on the surface of the compost and cover with a fine layer of compost or vermiculite, unless the packet specifies they should be left uncovered.
Plant bigger seeds more deeply – ½ to 1cm under the surface of the compost. Use a dibber or your finger to make a hole and drop in the seed, then backfill with compost.
Spacing
In module trays sow 2 seeds per cell and in 9cm pots sow 2-3 seeds. If more than one seed germinates remove the weaker seedlings to allow one to grow on strongly.
In trays try to spread out the seeds evenly. This can be difficult with fine seeds, so mix them with some dry sand before sowing as this makes it easier to see where they’ve been sown.
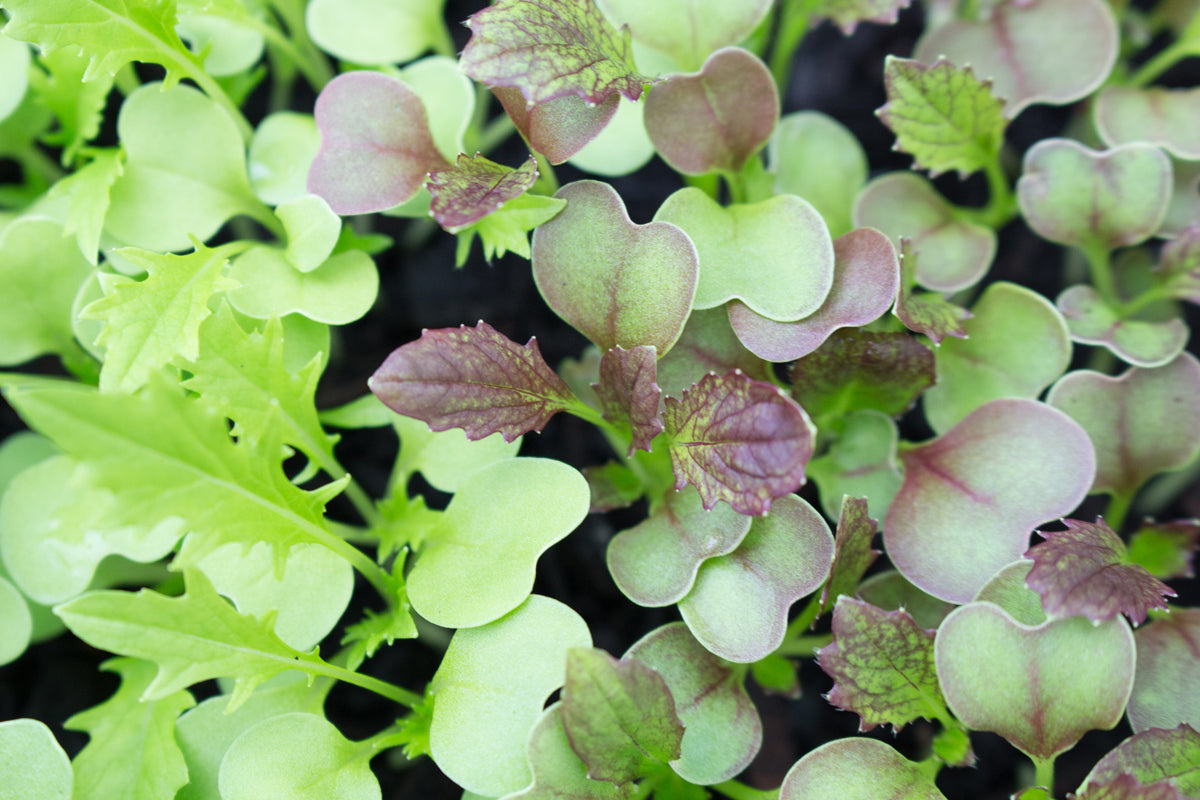
Sow too densely and the seedlings will compete for light, water and nutrients and they’re more likely to suffer from fungal diseases because they’re overcrowded.
After care
Use a watering can with a fine rose attachment on the end of the spout, as this will deliver a gentle flow of water which won’t disturb the seeds. Alternatively stand pots and trays in a shallow container or sink filled with a couple of cm of water and allow the compost to absorb the moisture from below. It should take about 5 minutes – you’ll be able to see the surface of the compost glistening. Remove from the water and allow the containers to drain.
Cover the trays with plastic lids and the pots with plastic bags held in place with elastic bands. This will create a moist atmosphere and stop the compost drying out.
Place the trays and pots somewhere warm and bright - a greenhouse is a good spot, and if you have a heated propagator this will help to speed up germination, particularly for tender plants that need higher temperatures to germinate.
When you can see shoots emerging remove the plastic covers, otherwise the young plants can succumb to a fungal disease known as damping off.
Pricking out
Once the seedlings have two sets of leaves - the first pair of leaves are known as the seed leaves and these look different from the plant’s actual leaves – it’s time to move them into individual 9cm pots. Prepare these pots, filling them with multipurpose, peat-free compost and make a hole in the centre with a dibber or your finger.
Loosen the seedlings from the compost, using a plant label to carefully lift the roots. Hold the seedling by the seed leaves, as it doesn’t matter if these get damaged at this stage, and lower into the hole so that the seed leaves are level with the surrounding compost. Firm the compost around the young plant and water.
Pot up a couple more plants than you plan to use so that you have some spares if some are affected by disease or are eaten by slugs.
Keep the plants somewhere frost-free that has plenty of natural light, and water every couple of days so that they don’t dry out.